

The SpectroCoin Public API is a RESTful JSON service with OAuth2-based authentication. It features predictable resource-oriented URLs, accepts form-encoded request bodies, provides JSON-encoded responses, and employs standard HTTP response codes, authentication, and verbs.
The API offers wallet management (accounts & transactions), live and historical currency data, currency conversion endpoints, merchant crypto-processing (projects, orders & callbacks), deposits and withdrawals across fiat and crypto rails, gift-card purchases, payment-method discovery and bulk-export data as CSV or PDF.
To ensure optimal performance and reliability, SpectroCoin has implemented rate limits and allocations for API endpoints.
Quick navigation.To quickly jump to any endpoint in the API reference, simply use the shortcut
Ctrl + /(on Windows/Linux) or⌘ + /(on Mac).
Interactive API Sandbox
Every API endpoint can be run directly and interactively from the documentation page. To start, select any of the API endpoints from the left side menu and follow the instructions below:
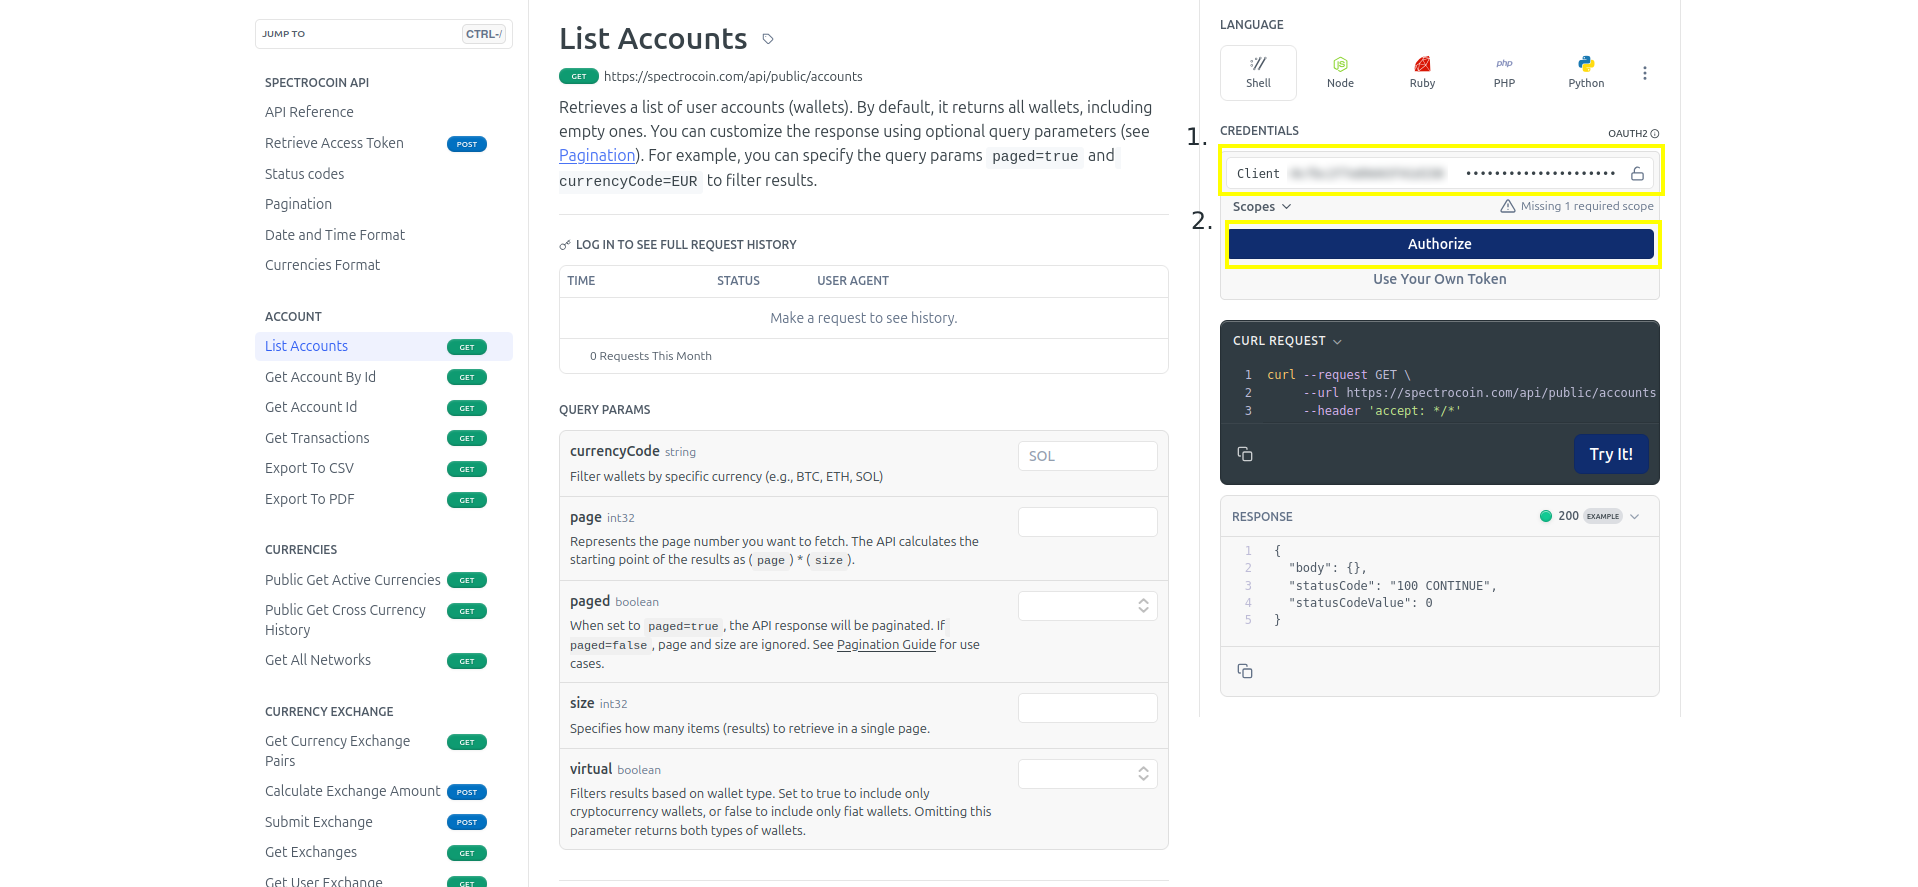
1. Fill Client Credentials and Authorize
From new or existing API copy and paste your client id and client secret (1.) and click Authorize (2.).
Successful authorizationTip: once you’re authorized, you’ll see a Bearer •••••••• label (token hidden) in the Authorization header—that means you’re successfully signed in.
Can’t find the credentials inputs? Do a hard refresh:Windows/Linux:
Ctrl + Shift + R
Mac:⌘ + Shift + R
If the auth section still doesn’t appear, the current endpoint is public and doesn’t require credentials.
Filling API client credentials and authorizing
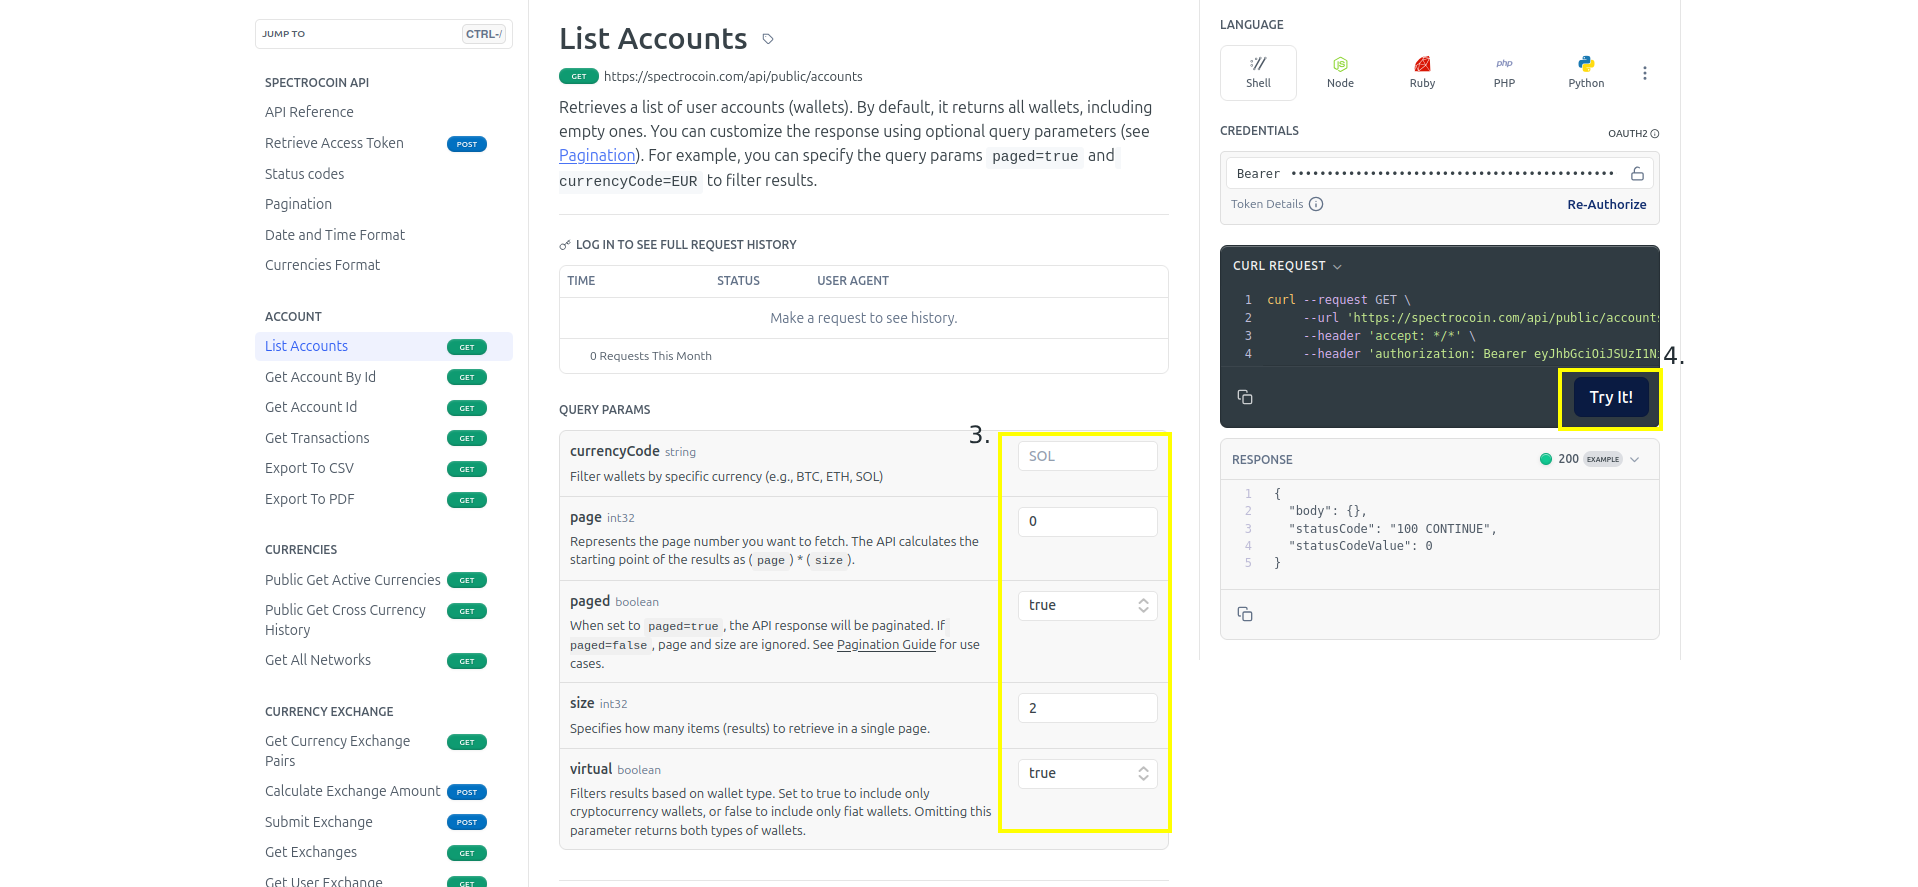
2. Fill query parameters and run the request
Depending on the API request, optionally fill the query parameters (3.) and click Try It! (4.) to run the request.
Making API call
3. Receive a response
View the details of the received response (5.), which contains status code and response body. Additionally Headers can be clicked to view full list headers.
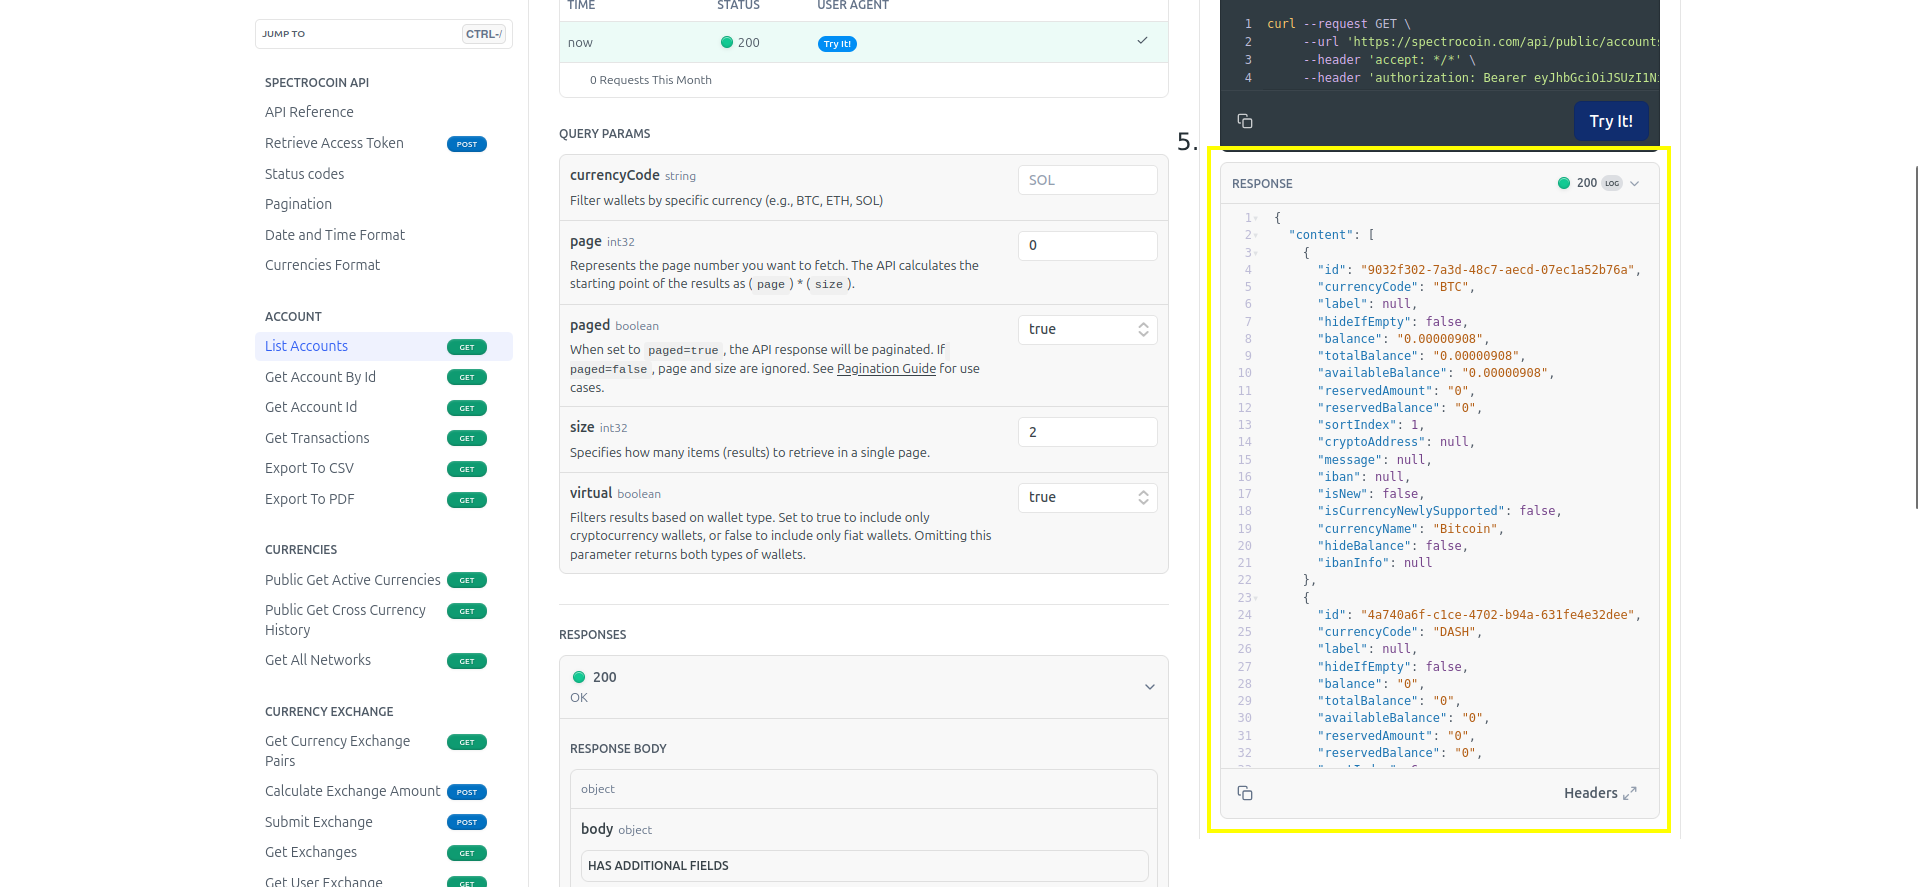
Viewing a success response body
Fork and Test on Postman
Get started quickly by forking our Postman collection - the very same one used in our SpectroCoin docs. It comes with placeholder settings for the necessary IDs so you can update them and test the API without delay.
How to set up Postman collection
First, fork the collection by clicking this button:

We suggest keeping the Watch original collection option enabled (it’s turned on by default). This way, you'll receive notifications about any updates made to the SpectroCoin API collection.
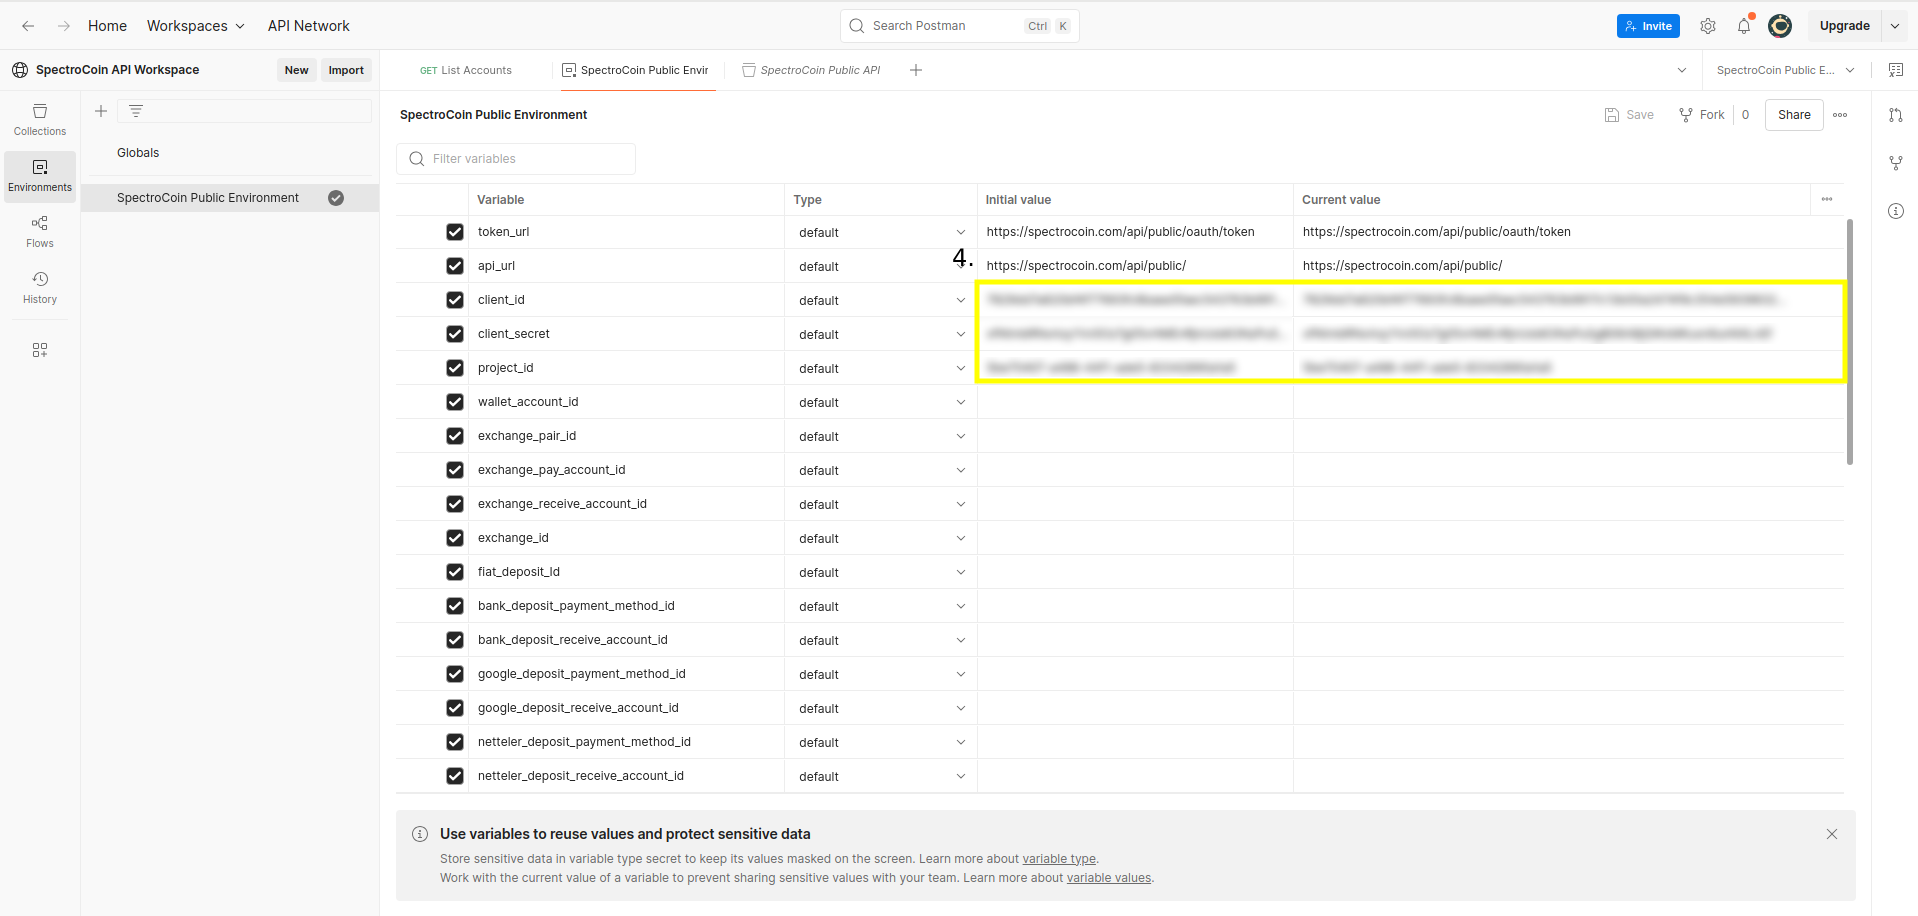
1. Activate the SpectroCoin Environment
When Postman web or desktop app loads the workspace, click on the Environments (1.). Then set the forked environment to active by clicking the check icon (2.). Next, proceed, by clicking on the SpectroCoin Public Environment (3.).

Setting SpectroCoin API environment
2. Populate Your API Credentials
From new or existing API copy and paste your client id and client secret (4.) - these are mandatory in order to use most of the API requests. Additionally, if you wish to use the merchant service, you will need to retrieve the project id also, if not sure how to get it, refer to this guide .
Populating mandatory API environment variables
3. Request a Fresh Access Token
In this step you will get the idea if the populated credentials are correct. Navigate back to Collections (5.), select forked collection SpectroCoin Public API (6.), click on Authorization (7.) and lastly - Get New Access Token (8.). If you see success message, that's great, now proceed using newly generated token.
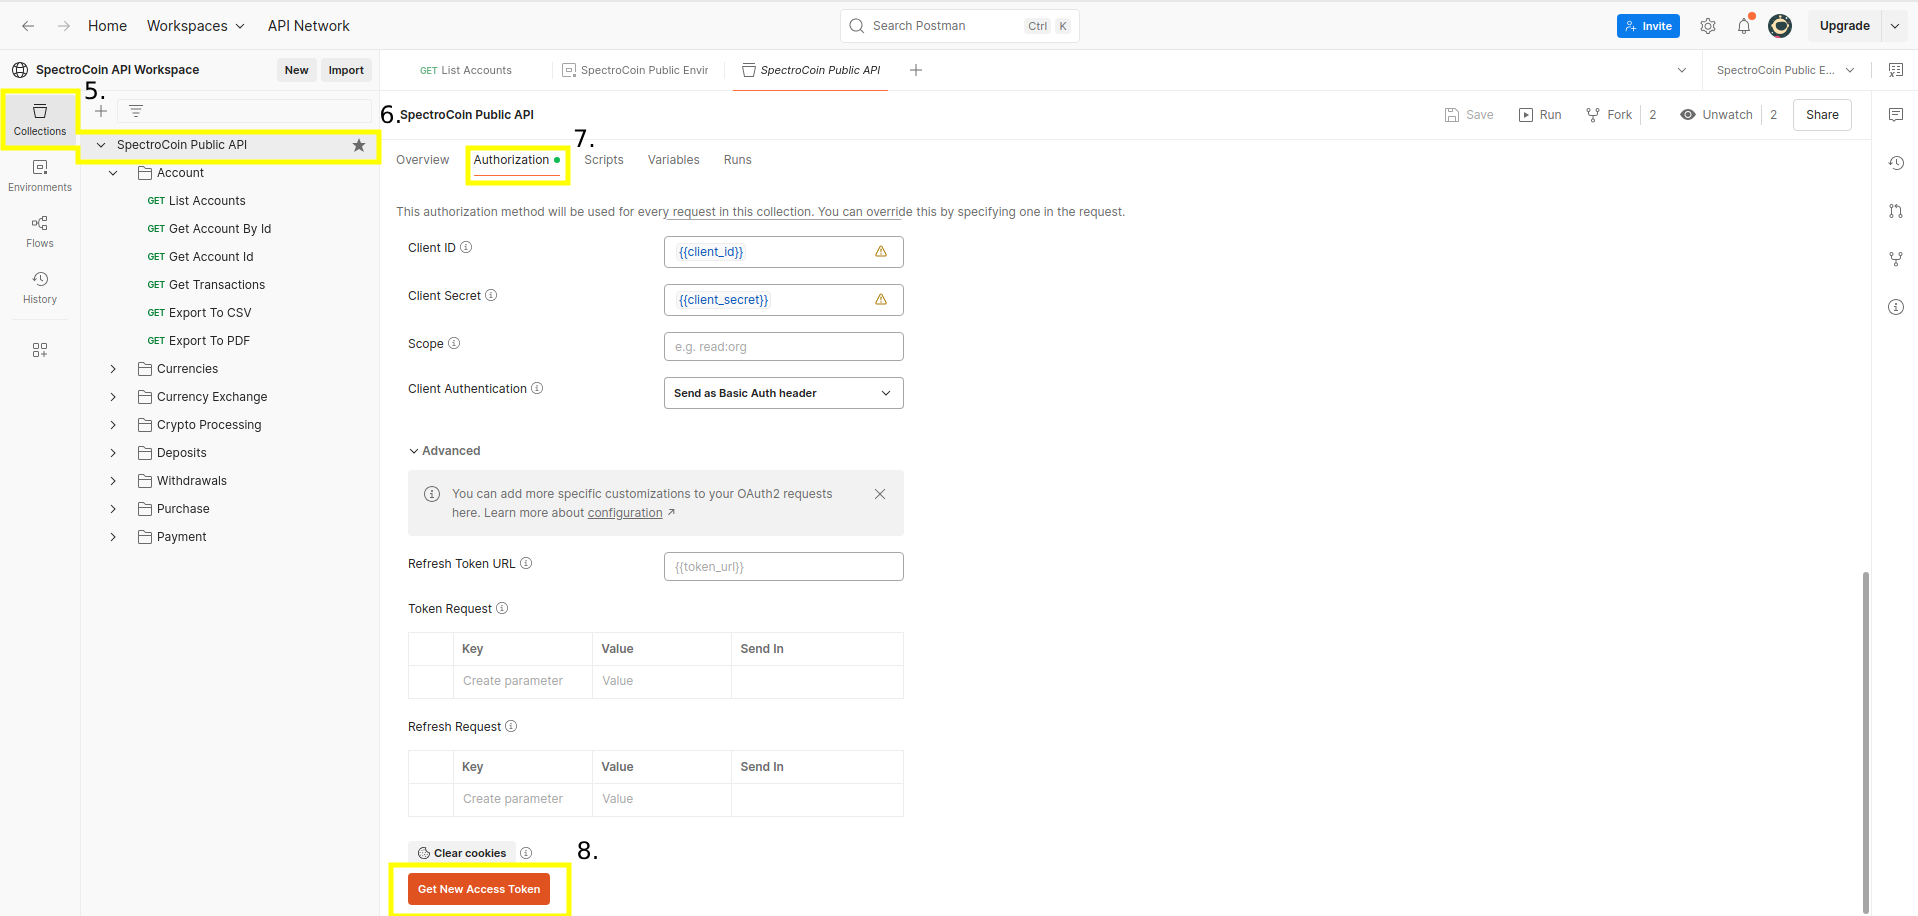
Requesting new access token
4. Send Your First API Call
For the final verification step, pick any request that doesn’t require mandatory parameters—here, GET List Accounts (8.)—and click Send (9.). A 200 OK status with the response body (as shown) means the forked collection is working correctly. If you see any other status code, please refer to our Status codes guide .
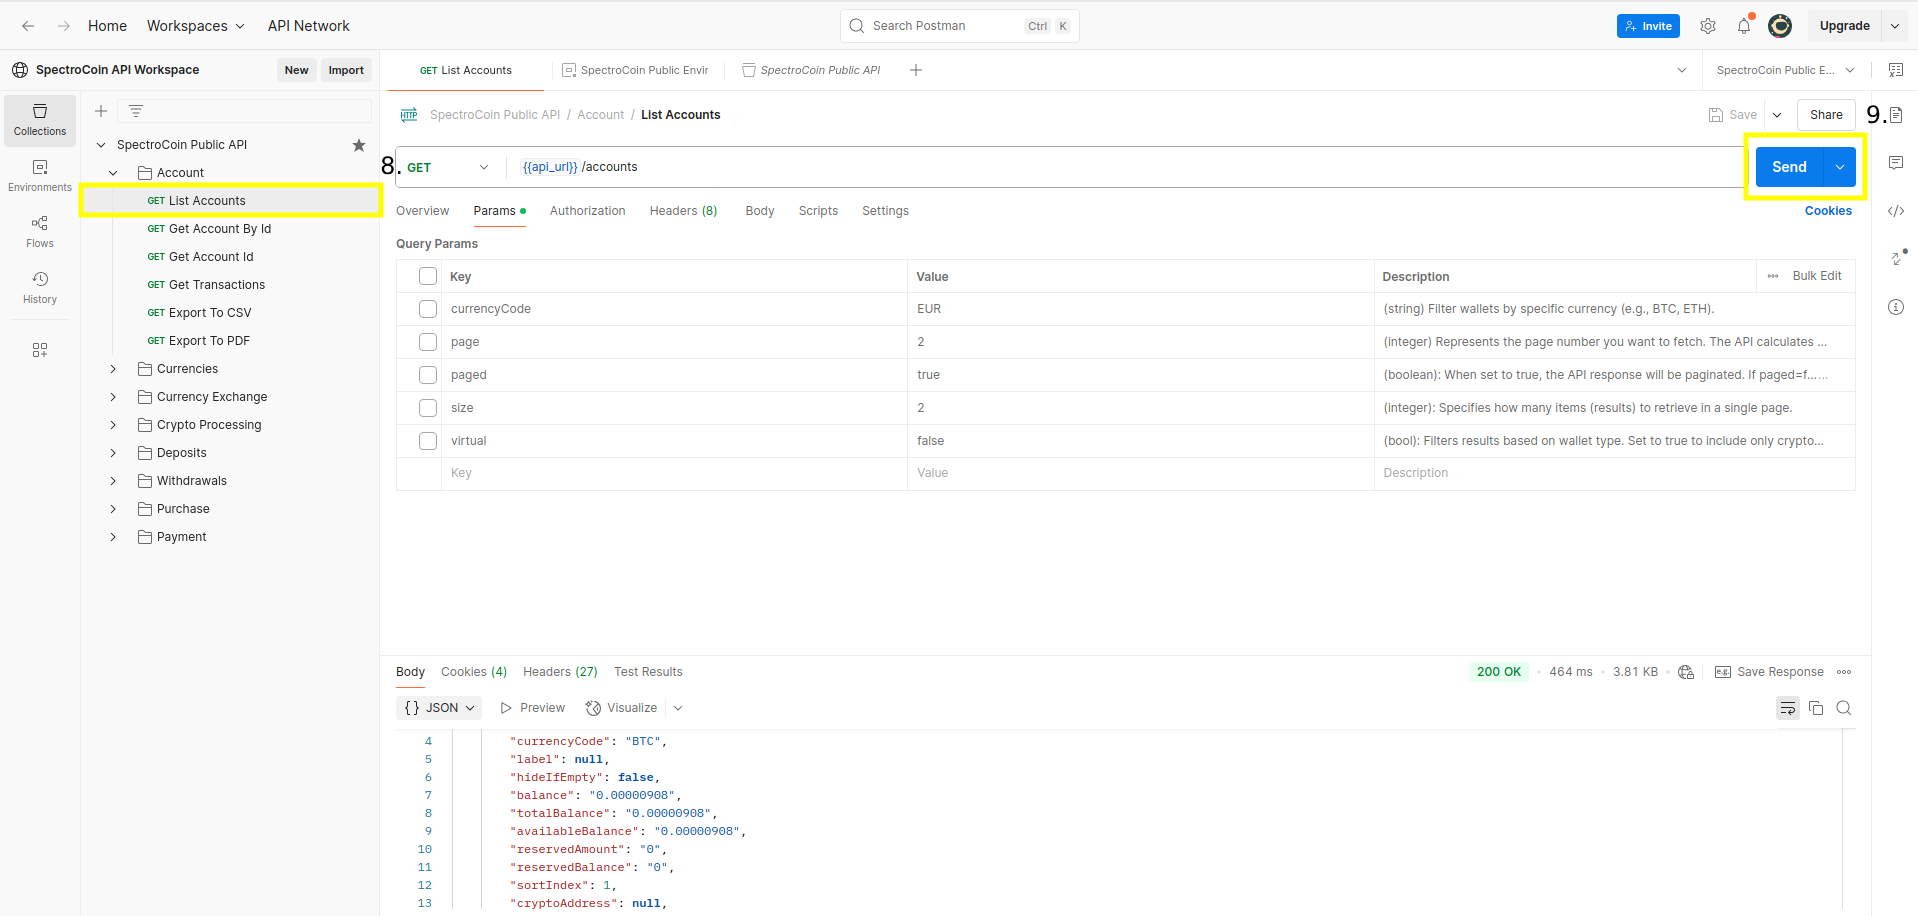
Making first API call
Versioning
When backwards-incompatible changes are made to the API, a new, dated version is released. Read our API upgrades guide to learn more about backwards compatibility. For all API updates, view our API changelog.
All requests use your account API settings unless you override the API version. The upgrades guide lists every available version.